The award winning Crosscentric cam system on the new MXR runs off a modular system for draw length adjustment. This means the draw length can be easily adjusted by removing one set of modules and replacing it with another set. Each mod is assigned a draw length for precise adjustment without the use of a bow press.
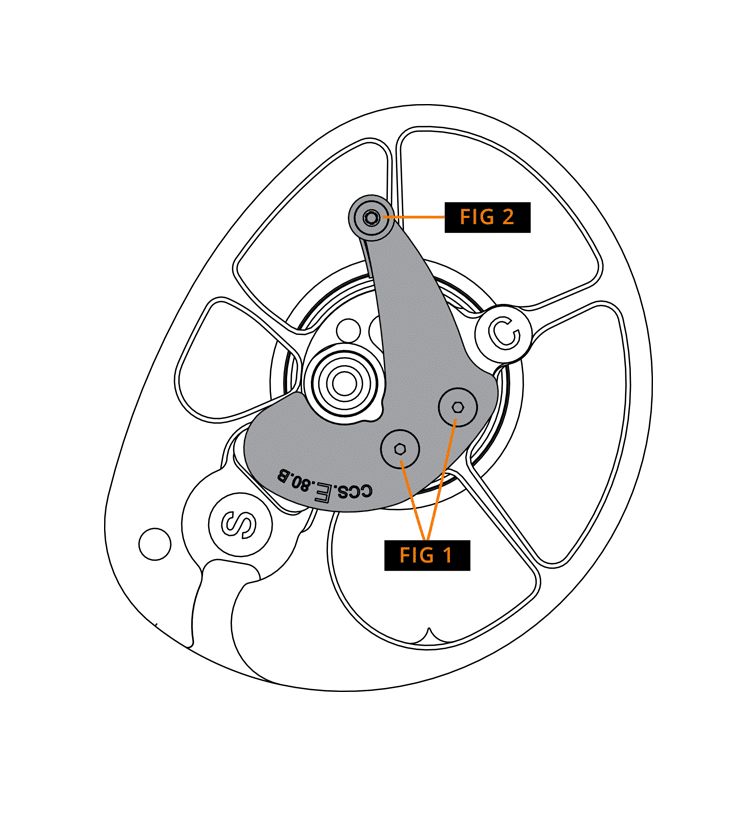
There are three screws located on the mod. Two of these screws ensure the mod stays secured to the cam (Figure 1), while the third is threaded through the felt wrapped draw stop at the very tip of the mod (figure 2). This draw stop is the part of the mod that comes in contact with the cable when at full draw. To remove the module, the draw stop must be removed first. Simply loosen the screw with a 5/64” T-handle Allen wrench and set aside. This will need to be reattached to the new module after it is replaced.
The final step is to reattach the draw stop to the tip of the mod. Thread the screw that is attached to the draw stop into the hole at the tip of the mod and tighten until snug. Do not over-tighten. Once the new mod is fully attached, you’re ready to start shooting.